![]()
7 Mic Placement Rules Podcasters Need to Know.
Microphone placement is one of the most important things when it comes to recording a podcast. Here, we’ll explore some of the simple steps you can take to make your podcast the best it can possibly be.
- Proximity
Get close to your microphone. Real close. Being too far away will lead to quiet audio arriving at the mic.
Having quiet audio is going to mean boosting the gain to achieve a suitable audio level, which in turn will lead to noisy audio as you’re also raising the noise floor.
These problems are further magnified when you’re also competing with ambient room noise or you’re recording in a room with reflective surfaces.
Imagine for a moment that your mic is a person and you’re trying your hardest to tell them about the long-term health benefits of oat milk whilst at a noisy party. Cause that’s what we oldies talk about at parties these
If you respect boundaries, the information is going to translate.
Here’s a little tip.
- Put four fingers between you and the mic. That’s 8 to 10 centimetres or 3 to 4 inches you should be aiming for.
Getting close means achieving a good level with a low noise floor and you’ll also benefit from something called the proximity effect. This is the boosting of bass frequencies the closer you are to the mic, which in turn makes you sound smoother and warmer (than you already are).
- Plosives
Getting close also means that your microphone will be more sensitive to higher pressure words, usually words beginning with P,B,C & T.
Try a little experiment:
- Put your hand in front of your mouth, the same distance as we said in point 1.
- Say “peanut butter, peanut butter, peanut butter, peanut butter, peanut butter, peanut butter, peanut butter, peanut butter, peanut butter, peanut butter, peanut butter, peanut butter…”
- You should feel the air pressure from these particularly plosive words hitting your hand. It’s also important to recite these words the exact number of times we’ve stated but there’s no time to explain why.
- Slowly start to lower your hand.
- Stop when you can’t feel the air pressure on your hand anymore.
Bingo! You’ve found where to position your mic. Now, you’re a close enough distance to the mic but the air pressure from those plosives will be travelling over the top of your mic instead of into it.
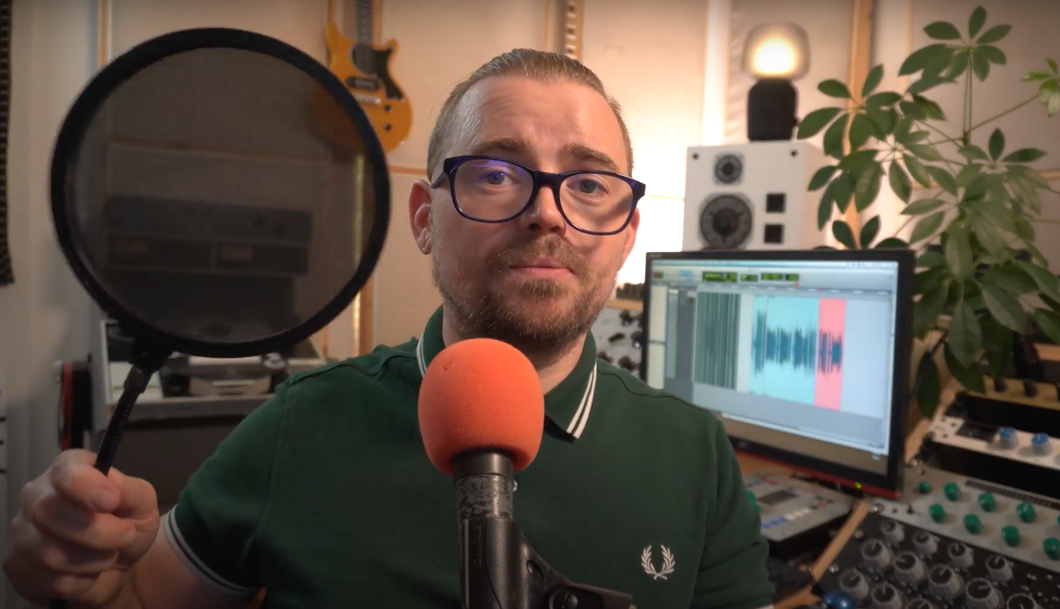
Make sure to position the mic towards your mouth instead of your chin and add a popper stopper that you can place either over the microphone itself or just in front of (both pictured below) to further reduce any plosive effect.
- Pickup Patterns
Different microphones have different pickup patterns.
The pickup pattern is the direction in which the mic picks up the sound and from which direction it will reject sound. The three most common patterns found in podcast microphones are:
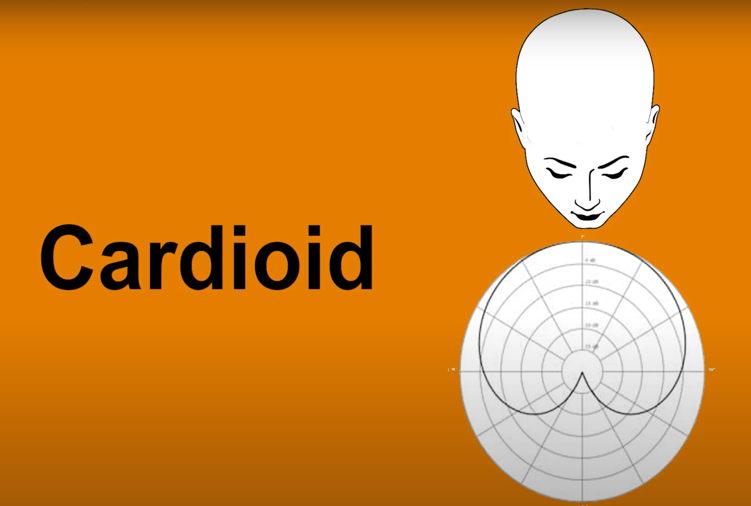
- Cardioid. Picks up sound mostly from the front, slightly less at the sides and rejecting at the rear, depending on what you’re pointing the capsule at.
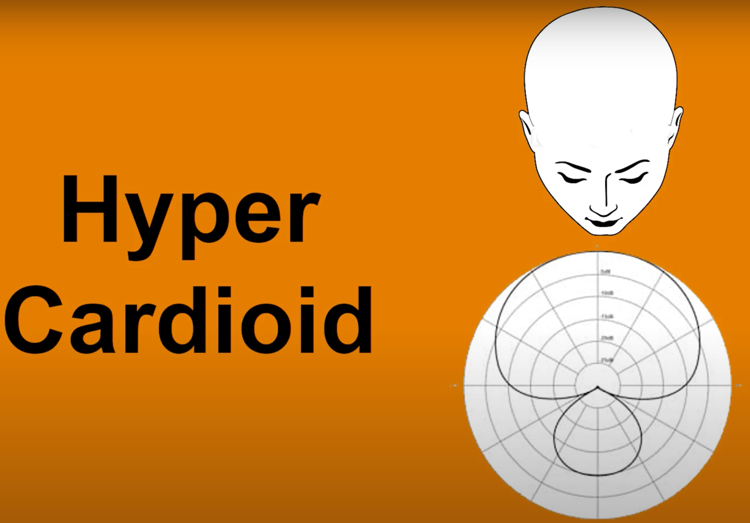
- Hyper-Cardioid. A more refined version of Cardioid, picking up more front, even less at the sides and rejecting at the rear, although less so than Cardioid.
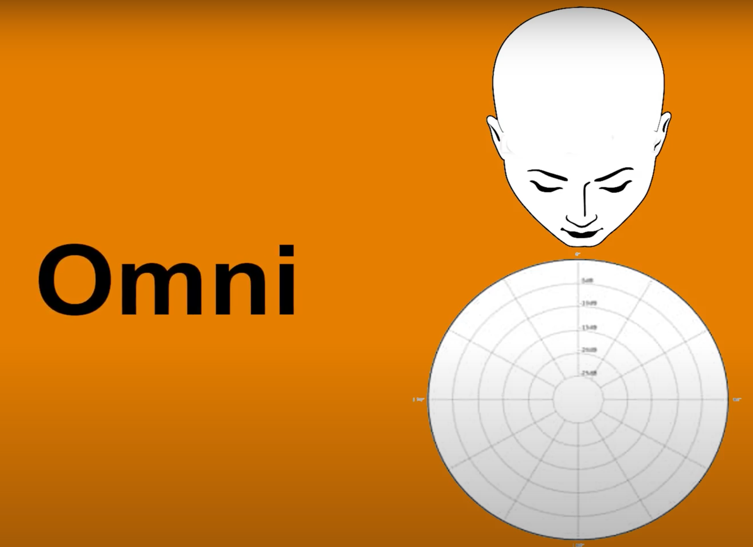
- Omni. Picks up everything in equal proportions in all directions and as a result does not have the same proximity effect as Cardioid.
If it’s not obvious by this point, Cardioid ticks all the boxes as the perfect choice for a podcast mic as it will pick up the human voice when closely positioned whilst rejecting everything else.
- Top or Side Address
It’s good to check on the microphone to see which way the capsule is pointing, is it Side Address or Topside? This means the input is at the side or at the top.
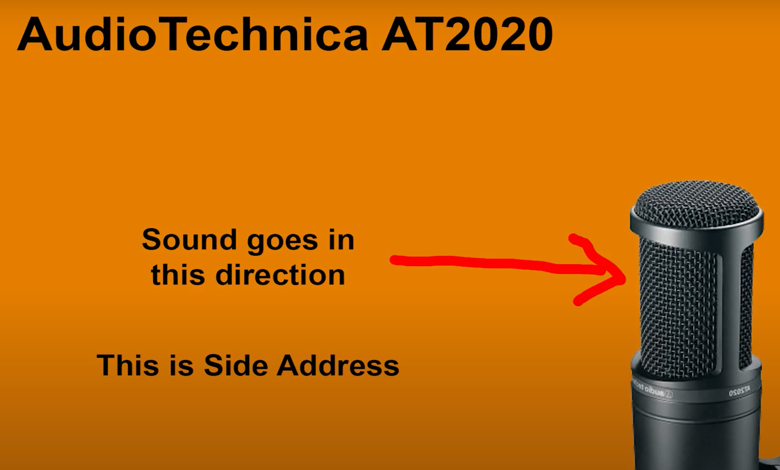
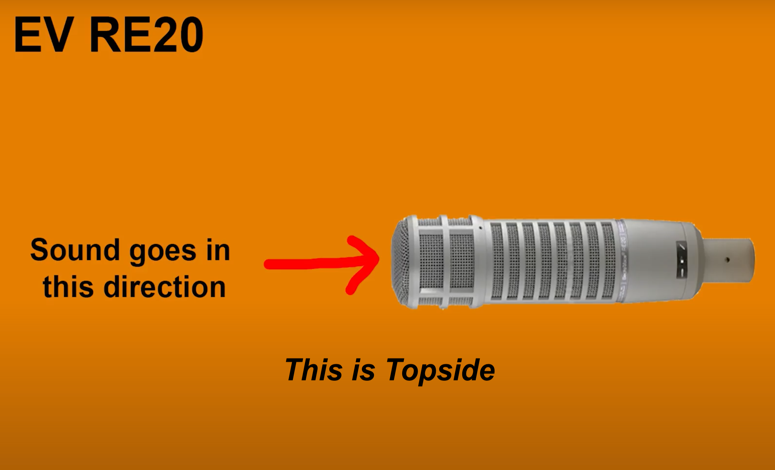
A good test for this is to put some headphones on and gently tap or lightly brush the mic at the sides and at the top to see which appears the loudest and clearest.
Some side address microphones may also have a logo that corresponds with the side that you speak in to, such as the Neumann pictured below (Cardioid logo circled in red).

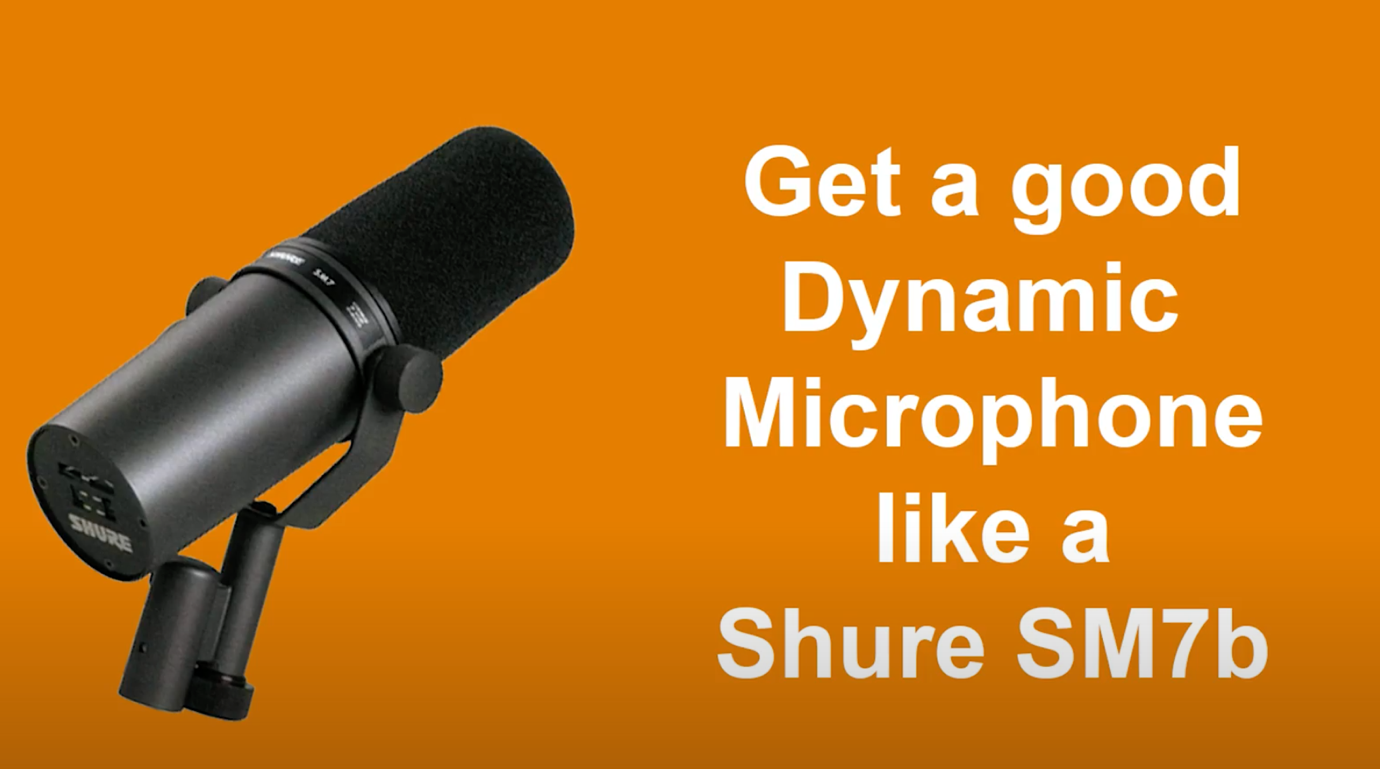
- Get a Dynamic Microphone
There are three different types of microphones:
- Condenser – Two membrane plates in close proximity acting like a capacitor.
Benefits: High sensitivity and wide frequency response
Negatives: Picks up absolutely everything.
- Dynamic – A moving coil attached to a membrane.
Benefits: Can take high sound pressure levels when positioned closely.
Negatives: Doesn’t have the widest frequency response and isn’t overly sensitive.
- Ribbon – A foil ribbon placed between 2 magnets.
Benefits: Smooth and natural sound, is easy to EQ without distortion.
Negatives: You need a pretty loud preamp and the ribbons are pretty easy to destroy, especially by breathing or blowing into them.
In short, get a Dynamic microphone for podcasting. They have less sensitivity and dynamic range, a narrower frequency response and because of that have a much better rejection to the noise around you.
- Ambience
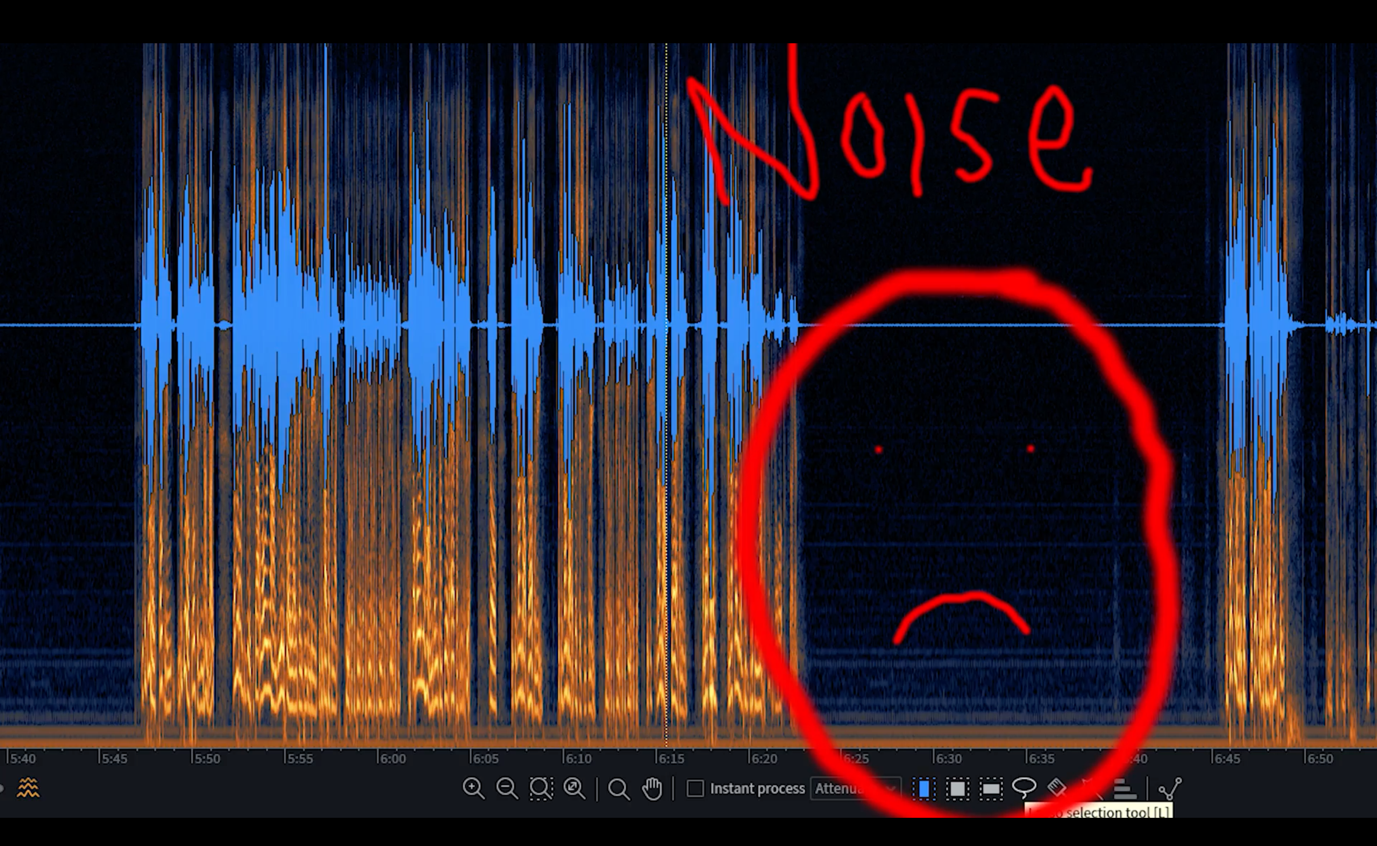
Perhaps the single most important factor in controlling how your podcast sounds is the environment that you record it in. Yes, there are some post processing tools that we can use to combat any natural reverb or noise from the room and environment you’re recording in, but this almost always comes with some sort of unpleasant side effect.
- Do – record your podcast in a room full of soft furnishings or even an acoustically treated room.
- Do not – record your podcast in a Cathedral right under the dome on wooden chairs on a tile floor during Sunday service.
The environment in which you record can be one of the biggest variables in podcasting, even though the perfect environment isn’t always a possibility, some steps can always be taken to make your life easier. For instance, try hanging a few duvets or blankets around you and your mic to block out those early reflections. You may look slightly mad but it works!
- Noises and Headphones
If after all of this you’re placing your microphone next to an open window with traffic going by or carrying the mic with you as you feed your dog, then, we may not be able to help you.
If you do however manage to find a nice quiet spot away from the window, another important factor is to wear headphones!
Failing to do so will result in your mic picking up the guest, which will lead to poor audio quality as well as severely impeding your ability to make any edits in post-production due to the echo from the audio bouncing between the speakers and the microphone.
Of course, as we all slowly edge our way out of a pandemic, we’ve gotten so used to the inbuilt noise suppression of software such as Zoom and Skype that we can forget to take precautions to preserve the quality of our audio.
We know remote interviews can be an integral tool in a podcasters kit, so following on from point 6, any pre interview preparation that can be taken to make sure all parties are in the best possible environment for a podcast recording can help save hours of needless post production.