![]()
How to Remove Static Background Noise From Your Podcast Using Izotope Rx
Podcasts are very rarely recorded in hermetically sealed, soundproof rooms, so being able to save your audio from distracting background noises can be a huge bonus. Here, we’ll break down a part of the process we use to clean up any potentially noisy audio files before the editing process can begin.
Noise Reduction
We prepare audio files within Izotope RX for audio restoration work.
RX offers a visual representation of what’s happening inside the frequency spectrum, meaning it’s usually quite easy to see where any possible problems may be located.

Noise floor
Today we’ll be focusing on something called the noise floor. Noise floor can be the consistent background hiss from the microphone itself or maybe an air conditioning unit buzzing away in the background etc.
Removing this type of background noise will make the editing process easier by being able to seamlessly shorten long pauses, adjust transitional flows, use fades, correct disjointed words and even join syllables of a stuttering person. All because you’re no longer competing with that distracting background noise.
Spectral de-noise
Inside RX, we can go into spectral de-noise, making sure that adaptive mode is turned off, so that we’re in the learn function, and then start the process of removing that distracting background noise.
To do this, we highlight the dark ‘dusty’ section without speech in between the blue sections of dialogue, and then click learn.
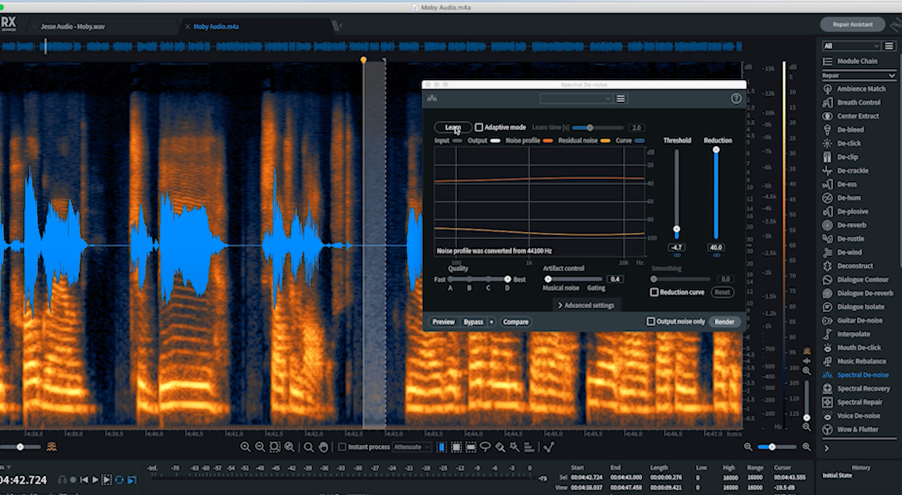
A quick breakdown of the settings; the quality is set at best; reduction curve is turned off and we’re ignoring smoothing
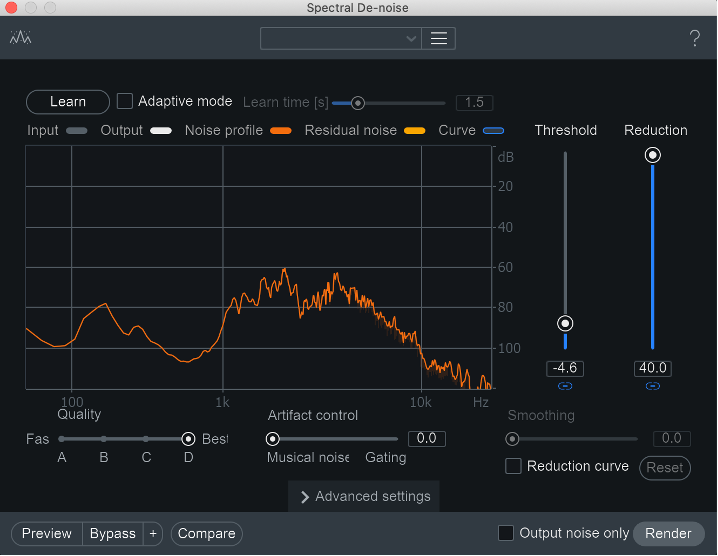
An important feature is artifact control, with the two options here being musical noise and gating.

Musical noise will remove all noise, all of the time as a constant, meaning it will always be taking away the noise profile below the threshold that we’ve set.
Gating will choose to open and shut the operation depending on where we’ve set the threshold. A combination of the noise profile and a little too high of a threshold can reduce the quality of the sound, so some of the problem frequencies may be added back into the speaker’s voice by sliding across to gating, to lessen the dramatic effect
Attention to detail
By highlighting a section that contains the problem frequencies, we can then select output noise only so that we’re only hearing the problem frequency (the delta signal). We’ll then start with the threshold low and reduction high, and start to slowly raise the threshold.

The aim here is to remove as much of the problem frequency as possible without encroaching on the vocal frequencies. You know you’re in the ballpark when you start to just about hear the speaker’s voice coming through in the audio.
Protip: It maybe worth backing off in reservation when you reach this point, just to be careful.
We’ll then de-select ‘Output Noise Only’ so that we’re left with the clean audio (alpha signal).
It’s always worth checking how the audio now sounds after RX has learnt the problem frequencies. Having bypass selected will preview the file without the noise removal. Flicking between a bypassed and unbypassed state, will help you know if you’ve eliminated the noise without reducing the quality of the original voice.
End product
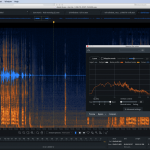
Rendering can be quite processor intensive and may take a little while, but you can see the dark dusty sections have been mostly cleaned up, and what you should hear is clear and audible dialogue without any of the previous background noise.
Even if the difference is subtle to start out with, in it’s finished compressed state the results are undeniably worth it.
Before

After